Now I did every iteration of fan layout possible, measured my temp tests under all the circumstances and what I now have is probably the best I will get short of replacing all the 120mm fans with that Akasa Apache which kicks out 60CFM. Also, the next logical step is water cooling, but I will only venture there if the summer's heat drives me to (haha, NI heat) or if I want to bump up to 4.4GHz.
Onwards. I am currently running the PC in a room which is getting warm (thanks fire) and I will be able to stress test as-if the summer was here, and actually warm. More on that later (at a cursory glance the temps have gone up a few degrees, but not much.
What I did:
So in that burn test I have it from a peak of 82*C down to a peak of 74*C... much happier now!
In any case there is excellent air throughput now! Some temps for you (Idle):
Before (at new 4.1GHz clock):
Case: 21
CPU: 26
C0: 36
C1: 32
C2: 33
C3: 29
GPU: 35
After (also at 4.1GHz clock):
Case: 19
CPU: 20
C0: 30
C1: 26
C2: 27
C3: 21
GPU: 30
Vcore: 1.31v measured by CPUID (BIOS set @ 1.318750 I think)
Vin1: 1.62 - measured by CPUID (BIOS was set to 1.64)
Bclock: 216MHz
Multiplier: 19x
DRAM multiplier: 6x
Core Speed: 4104MHz
DRAM Speed: 1296MHz
DRAM Timings: 9, 9, 9, 24
All extraneous power BIOS power functions, power save, turbos etc etc... turned off.
Onwards. I am currently running the PC in a room which is getting warm (thanks fire) and I will be able to stress test as-if the summer was here, and actually warm. More on that later (at a cursory glance the temps have gone up a few degrees, but not much.
What I did:
CPU cooler back to normal (ie 92mm fan).
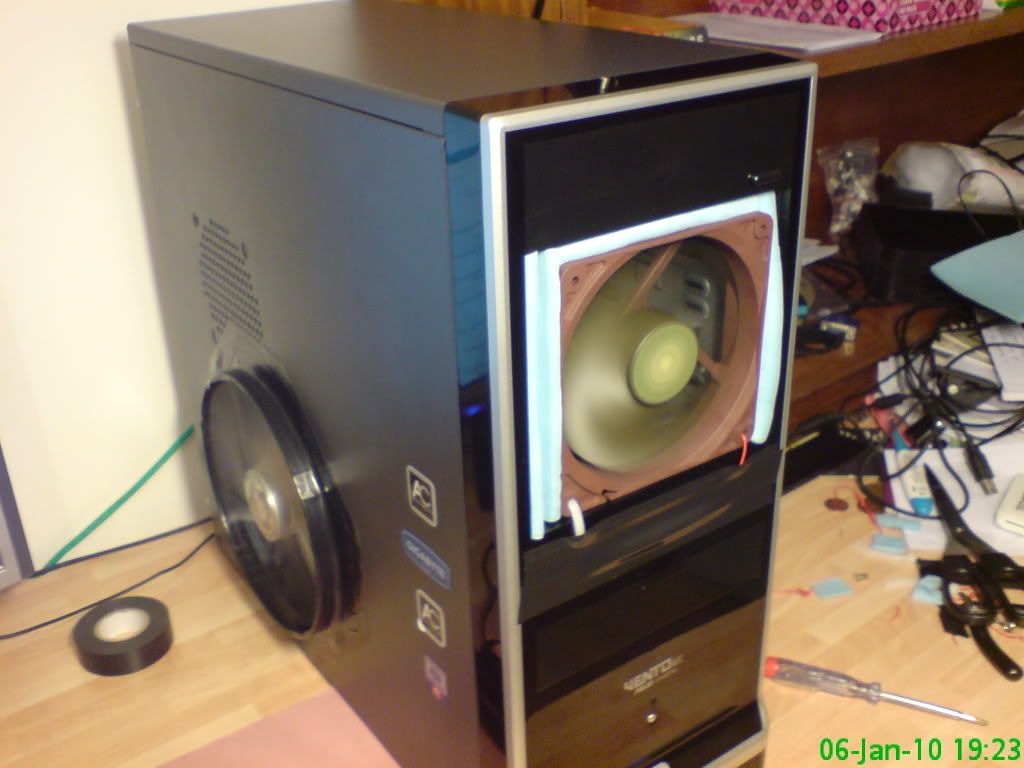
5.25" drive bays opened, Akasa Apache 120mm fan installed sucking in.

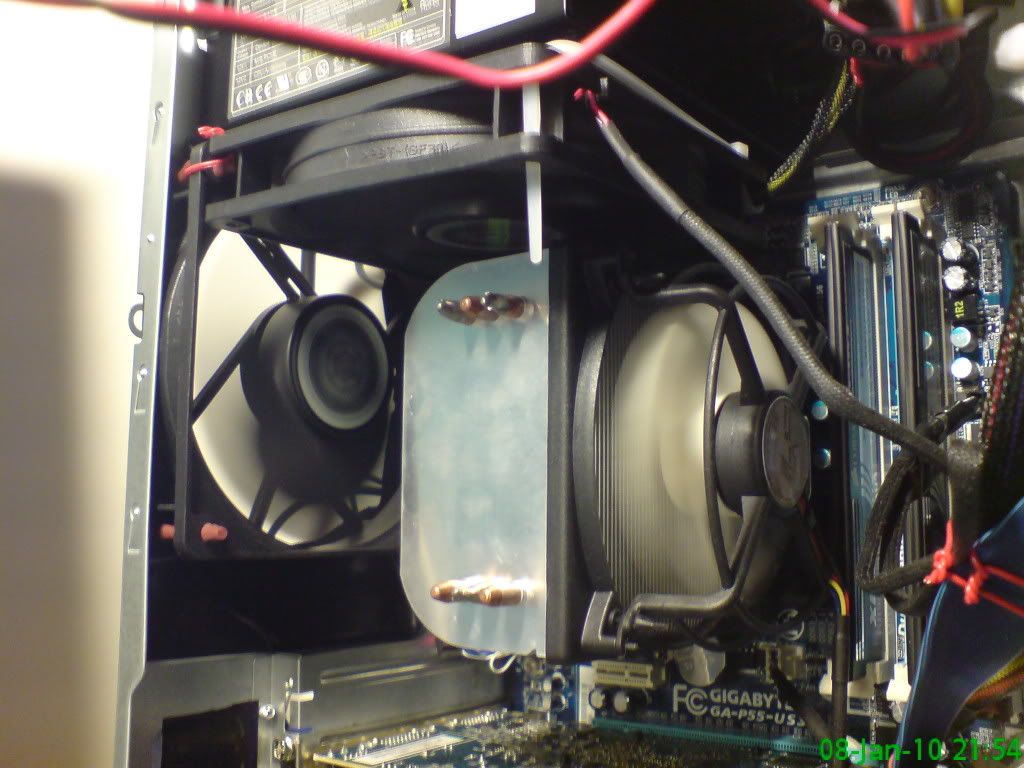
Rear 120mm fan extracting.
120mm fan (perpendicular to the rear case fan, sucking air through the CPU cooler and out the PSU fan).
120mm fan (perpendicular to the rear case fan, sucking air through the CPU cooler and out the PSU fan).

So in that burn test I have it from a peak of 82*C down to a peak of 74*C... much happier now!
In any case there is excellent air throughput now! Some temps for you (Idle):
Before (at new 4.1GHz clock):
Case: 21
CPU: 26
C0: 36
C1: 32
C2: 33
C3: 29
GPU: 35
After (also at 4.1GHz clock):
Case: 19
CPU: 20
C0: 30
C1: 26
C2: 27
C3: 21
GPU: 30
In the following test the 5 temperatures are the temperatures of the CPU die for each iteration of the test of which 5 were run.
Before (Improved Vcore, sub-optimal fan setup!)
Burn test (CPU temp):
53, 63, 66, 67, 67 with a core peak of 78
After (Improved Vcore and fan setup)
Burn test (CPU temp):
59, 62, 63, 63, 64 with a core peak of 74
Before (Improved Vcore, sub-optimal fan setup!)
Burn test (CPU temp):
53, 63, 66, 67, 67 with a core peak of 78
After (Improved Vcore and fan setup)
Burn test (CPU temp):
59, 62, 63, 63, 64 with a core peak of 74
Now some nerdy things. (turn away if numbers give you dizzyness!) Bear in mind that measured voltages don't often 100% match set BIOS voltages, so U try to give an account of both where applicable.
Vcore: 1.31v measured by CPUID (BIOS set @ 1.318750 I think)
Vin1: 1.62 - measured by CPUID (BIOS was set to 1.64)
Bclock: 216MHz
Multiplier: 19x
DRAM multiplier: 6x
Core Speed: 4104MHz
DRAM Speed: 1296MHz
DRAM Timings: 9, 9, 9, 24
All extraneous power BIOS power functions, power save, turbos etc etc... turned off.
My previous settings were something like (for the 4.1GHz clock):
Vcore: 1.36v measured by CPUID (BIOS set @ 1.3618 I think)
Vin1: 1.62 - measured by CPUID (BIOS was set to 1.62)
Vin1: 1.62 - measured by CPUID (BIOS was set to 1.62)
So initially I got the Vcore as low as possible by lowering by a step, testing, repeat. When it failed to boot and was unstable I bumped it up a setting or 2 and stress tested. Thermal implication is that lower voltage is obviously going to heat the chip less, and even though we are changing millivolts here, it really matters! I got ~2*C off the chip temp by getting the Vcore slimmed down! What I did find was that with the Vcore at its most efficient setting, I had to bump the Vin1 for the RAM from 1.62 to 1.64V. Note that the ram will work fine at 1.65V. (my Gigabyte m/board adds in .02 at a time, so 1.64/1.66/1.68 etc... but 1.64 is working well.
To break this down into manageable data:
CPU speed is a by product of the FSB x Bclock multiplier. Vcore supplies the voltage/power for the chip. This is nominally AUTO, but when clocking you want control of it.
On the i5 1.35-1.4v is about a high as they recommend pushing it.
RAM speed is a by product of FSB x DRAM multiplier. Vin1 supplies the voltage/power for the RAM chips. Again, this is AUTO, but in clocking you need the control to give the RAM more power when needs be.
You change the FSB to accommodate a higher clocking and since the CPU and DRAM are affected by this you may have to settle for a lower RAM speed.
It is recommended that the Vcore and Vin1 are kept within 0.5v of each other.
At 4.1GHz my CPU benchmark was 7115.5 which I am dead pleased about! I ran a bunch of stress tests. OCCT for 4 hours, Prime95 - 2 hours on large FFTs, 10 mins on small FFTs (I read that 10 mins should show whether the system would cope or not), hours on blend. Intel Burn Test - I ran the default 5 cycles, and it pushed the chip hard, but it was fine. I also ran SuperPi and LinX.
I am monitoring heat with:
SpeedFan
Core Temp
CPUID
Real Temp
Stress testing with:
OCCT
Intel Burn Test
Prime95
LinX
SuperPi
Benchmarking with Performance Test 7 on evaluation.
Benchmarking with Performance Test 7 on evaluation.
The settings which REALLY push the processor are the small-FFTs. I assume that stands for Fast Fourier Transform, and there endeth my knowledge on that matter! Also LinX gets her warm!
Now in the future I can see me running a water-cooled unit to get that 4.4GHz, but until then I may as well do some work on this instead of endlessly testing it. Currently a faster computer has led to less work done than ever (except computer faffing and searching for bandsaws...).
Finally, I have the black plastic 5.25" drive bay overs to cut up and make the front fans look much neater - everything is a bit "temporary" right now, and it will eventually look neat! That black tape on the side fan will be cut into a circle soon.
That ought to do it for now, I must process some photos and try to find a 14" bandsaw somewhere. I forget that we are in 2010... and I was born *after* imperial was the norm, so I should really be talking MMs more! 350mm would do :) I blame dad for my use of both systems (not totally illogical - lots of the guitar gear is american, and sometimes inches just work neater!).
God bless all,
Mike
No comments:
Post a Comment